huga Posted October 30, 2012 Share Posted October 30, 2012 (edited) I don't know if anyone will find this helpful, so ignore me if you like. I've been meaning to do this for ages, as it's something that I see everywhere - oversmooth, plastic skin and glowing eyes :laugh: Also, a lot of people won't mask around hair and eyebrows - smoothed out hair looks weird. Eyes that have lost their sharpness also look quite bizarre. As a rule, I don't touch the skin of kids (except to clone out dirt and snot etc), as they usually have the best skin! I don't like to touch the skin of adult clients much either, besides smooth out lumps and bumps and maybe dark shadows under eyes. Often newborns need a bit of work, because they can be a bit spotty and red. I've used myself as an example, because it's only fair and I do have a fair amount of blemishes. So this is SOOC, just cropped and converted to jpeg: So you can see I need some work. First I clone out obvious blemishes: I decided that the bags had to go too. There are a million ways to do this, but I am all for quick and easy and not really OTT. So I create another layer, clone out the bags and then reduce the opacity so it looks natural. Because no darkness under the eyes does not look natural, it looks weird. So now the smoothing part. This is how I do it (quick, easy and probably not the best way - but again there are a million different ways): Create another layer Go to Filter-Blur-Surface Blur - I have radius at 22 and threshold at 19 Hit ok, and you will get something that looks like this: Pretty. Let's fix it. Create a layer mask (but it's not a layer mask, I think it's called something else) - hold down option (alt on windows, I think) when you hit the little layer mask icon in the layers panel. Image should go back to normal, but your blur layer should have a little black square next to it (not a white one). Go get your brush, reduce the opacity to around 50-70% and brush on the areas you want smoothed. Avoid eyes, eyebrows, lips and hair. If you do go over them, switch the brush to black and you can brush that detail back in. After you've finished smoothing, drop the opacity of that layer down again, so it looks nice and natural. Then I brighten the eyes a touch (dodge tool), sharpen, merge and I am done. This is the final result: This is what it looks like when taken too far (and I see it ALL the time, especially on kids - plastic skin and glowing eyes): Eeeeek! Run away - very fast. And for those who like a before and after: Edited October 30, 2012 by huga Link to comment Share on other sites More sharing options...
Kadbury Posted October 30, 2012 Share Posted October 30, 2012 Very informative - I am a novice but I can appreciate the difference. I hate the Plastic/sparkle eyes too. Thanks for sharing. :D Link to comment Share on other sites More sharing options...
fuzzy82 Posted October 30, 2012 Share Posted October 30, 2012 Nice, very easy and informative :) Just curious though, the first bit where you create a new layer, clone and then reduce the opacity, isn't that what the heal tool does? I don't do much photo editing, I mostly use photoshop for design stuff, so I don't know all that much about fixing photos. The most I've done is a bit of cloning for obvious pimples and fixing demonic cat eyes. Link to comment Share on other sites More sharing options...
huga Posted October 30, 2012 Author Share Posted October 30, 2012 Nice, very easy and informative :) Just curious though, the first bit where you create a new layer, clone and then reduce the opacity, isn't that what the heal tool does? I don't do much photo editing, I mostly use photoshop for design stuff, so I don't know all that much about fixing photos. The most I've done is a bit of cloning for obvious pimples and fixing demonic cat eyes. Yeah :laugh: Like I said, there are a lot of different ways to do the same thing. I love my clone tool though. Link to comment Share on other sites More sharing options...
Vehs Posted October 31, 2012 Share Posted October 31, 2012 oooh!! I just like reading these things I don't really have a camera or any editing stuff - but I have seen some shocking smooth faces on a rellies FB photos lately. They've been using an amateur family photographer, but she's happy and I like your new hair :) Link to comment Share on other sites More sharing options...
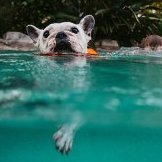
huga Posted November 1, 2012 Author Share Posted November 1, 2012 Just found this on Pinterest - a nice quick edit :) Link to comment Share on other sites More sharing options...
piper Posted November 1, 2012 Share Posted November 1, 2012 Both tutorials are great. Thanks for sharing Huga, I always love your processing. Link to comment Share on other sites More sharing options...
kittikat Posted November 1, 2012 Share Posted November 1, 2012 Totally agree Awesome information ! Many thanks Huga :D Link to comment Share on other sites More sharing options...
Juddabug Whippets Posted November 23, 2012 Share Posted November 23, 2012 Excellent... I don't do any of the touch ups as such... Yet! But would really like to get the jist of it! I guess practice is your best friend... As well as great tutors! Thank you! Link to comment Share on other sites More sharing options...
gapvic Posted January 27, 2013 Share Posted January 27, 2013 Argh Photoshop drives me mental! Hoping someone can guide me. I want to smooth some skin. I've created the layer mask, get my little black square, but when I bring up the brush nothing happens at all. Have no idea what I'm doing wrong. Can anyone point me in the right direction? Ta! Link to comment Share on other sites More sharing options...
kja Posted January 27, 2013 Share Posted January 27, 2013 Nice!! There's a few 'togs around who routinely do the plasticine route and while I hate it, they are being booked for serious dollars. Strange that people think it looks awesome and are willing to pay! Link to comment Share on other sites More sharing options...
gapvic Posted January 27, 2013 Share Posted January 27, 2013 ignore my question - finally worked it out after hours of struggling with the damn thing last night lol! For anyone else with the same problem, the foreground colour needs to be set to WHITE not black. Link to comment Share on other sites More sharing options...
huga Posted January 28, 2013 Author Share Posted January 28, 2013 ignore my question - finally worked it out after hours of struggling with the damn thing last night lol! For anyone else with the same problem, the foreground colour needs to be set to WHITE not black. You poor thing! I didn't see this earlier. Yes, you need the opposite colour to whatever your mask is to brush back. Link to comment Share on other sites More sharing options...
gapvic Posted January 28, 2013 Share Posted January 28, 2013 LOL thanks Huga :) . I find photoshop somewhat of a challenge and was tearing my hair out trying to work out what I was doing wrong. Link to comment Share on other sites More sharing options...
huga Posted January 28, 2013 Author Share Posted January 28, 2013 LOL thanks Huga :) . I find photoshop somewhat of a challenge and was tearing my hair out trying to work out what I was doing wrong. It definitely is! I probably only know how to use about 3% of it :laugh: Every now and then I get curious about something, hit youtube for a tutorial and with a bit of hair tearing, figure it out. It's a complicated beast. Link to comment Share on other sites More sharing options...
Recommended Posts
Create an account or sign in to comment
You need to be a member in order to leave a comment
Create an account
Sign up for a new account in our community. It's easy!
Register a new accountSign in
Already have an account? Sign in here.
Sign In Now